
(Supplies listed at end of blog post)
Instructions:
Step 1: Die-cut Scenic Pines from textured white c

Step 2: Create a mask for air-brushing by die-cutting another Scenic Pines from scrap cardstock. Trim away trees.

Step 3: Position mask and secure with repositionable tape. Airbrush trees with JG6 marker -spraying smaller trees a little darker than bigger trees.

Step 4: Remove mask carefully, to prevent tearing the paper.

Step 5: Using BG6 marker, color tree trunks and small areas where larger trees overlap the smaller trees. This will create depth.

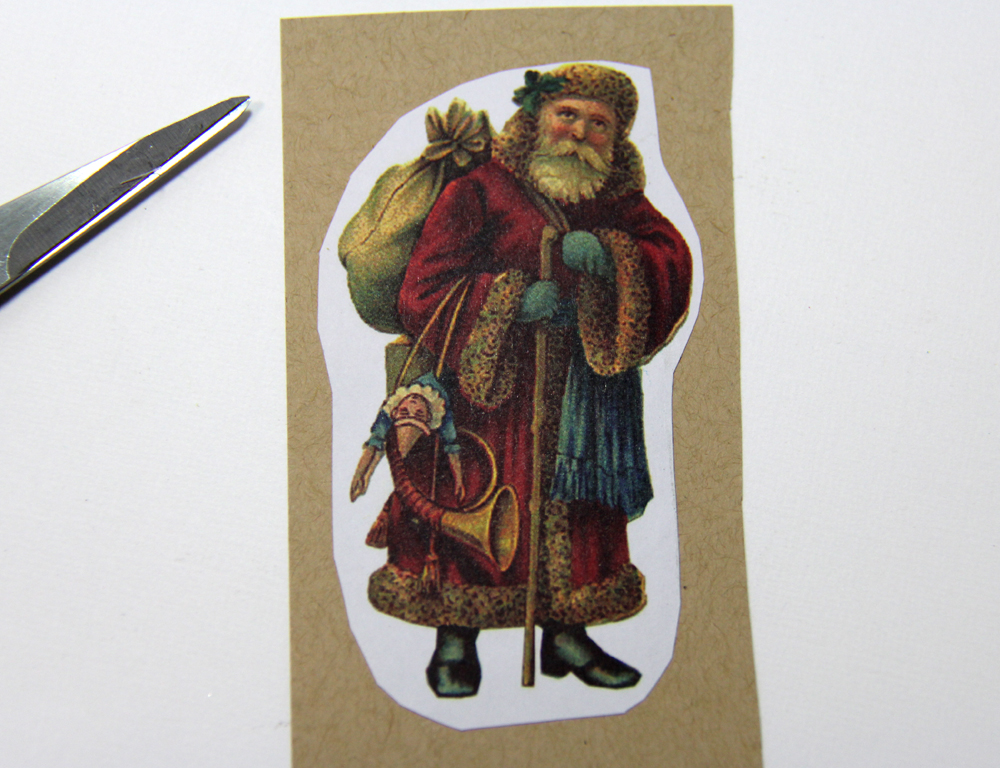
Step 6: Adhere Santa image to scrap piece of Kraft cardstock. This will create a sturdy piece to trim out and attach to card. Closely trim image with detail scissors. NOTE: The Santa image is from the paper pack that is included with the Crafter’s Companion Inspiration Magazine Issue 5 - Christmas Edition.
Step 7: Lightly sponge edges with Walnut Stain Distress Ink.

Step 8: Emboss 5” x 3 ¾” Kraft cardstock panel with snowflakes embossing folder. Sponge on Old Paper Distress ink with ink blending tool. Also, sponge this ink color around the edges of the Scenic Pines die-cut piece.

Step 9: Sponge on Aged Mahogany Distress ink with ink blending tool.

Step 10: Sponge on Walnut Stain Distress ink with ink blend tool.

Step 11: Apply Clear Rock Candy Distress Stickles to all 3 pieces. Let dry completely.

Step 12: Stamp sentiment with VersaMark on red cardstock. Apply embossing powder and heat emboss. Trim with scissors to create a banner.

Step 13: Apply Distress Stain around outer edges of front of 5 ½” x 4 ¼” Kraft notecard. Let dry.

Step 14: Assemble Card as follows: Adhere snowflake panel to 5 ¼” x 4” red cardstock panel. Staple sentiment to panel. Adhere tree border. Attach entire panel to notecard with dimensional foam tape. Attach Santa to card with dimensional foam tape.

IF by chance you don't get all those handcrafted cards done in time for Christmas, just change up the sentiment. It could be a "thank you" or "thinking of you" card. Or just leave off the sentiment and write a letter inside. Remember the days of writing letters? Yeah...text messages just don't say it like a handmade card with your very own handwriting. Just sayin'
Have a great day!

Supplies:
Crafter's Companion Vintage Christmas Collection EZ Mount Stamp Set - Sentimentals Home For Christmas
Crafter’s Companion Inspiration Magazine Issue 5 - Christmas Edition - Paper Pack and Vintage Christmas Snowflake Flutter Embossing Folder
Die'sire Classiques Christmas Scenic Pines Die
Shimmering Cardstock Candy Red
Kraft Cardstock
Textured White Cardstock
Spectrum Noir Markers JG6, BG6
Craftwell eBrush
VersaMark Ink
Distress Inks - Aged Mahogany, Walnut Stain and Old Paper
Ink Blending Tools
Distress Stickles Clear Rock Candy
Ranger Liquid Platinum Embossing Powder
Distress Stain Picket Fence
Mini Stapler
Dimensional Foam Adhesive
Washi Tape or Easy Release Tape
Heat Embossing Tool
Detail Scissors
Die Cutting/Embossing Machine
No comments:
Post a Comment